Posts

Showing posts with the label Copic Markers

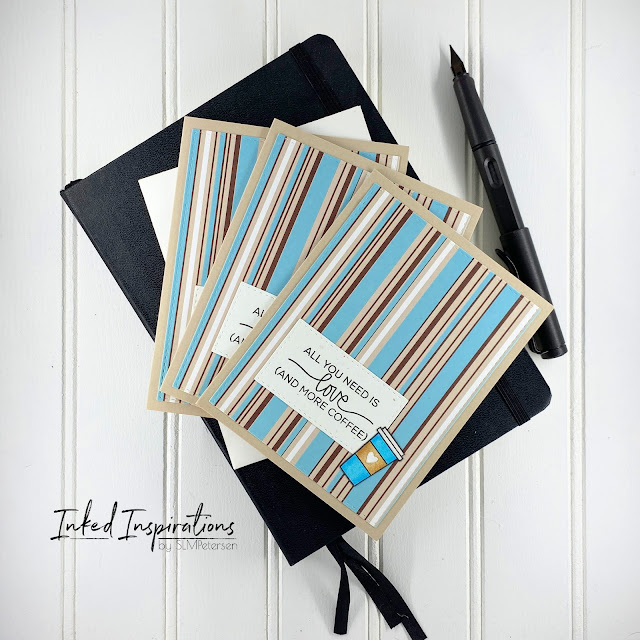
Creating Multiples - All You Need is Love & More Coffee
Image
Do you create in singles or multiples?  I do both.  Multiples can be anything from two to six or more.  When I create multiples I often create them with patterned paper.  This is determined by how much of a specific pattern I have, it dictates how many of a card design I can create.   For today's cards, I had enough striped paper to create three cards.  I let the paper dictate the color palette for the card designs.  When I pulled these stripes from the basket I felt a coffee shop vibe, so coffee cards they became.   These stripes are bold and can carry a card on their own, so I needed a bold sentiment and a little embellishment to keep them clean and simple.  I pulled a sentiment and coffee cup from the Technique Tuesday Perk Up stamp set.  I used my favorite set of stitched rectangle dies to cut both the pattern paper and sentiment block.   I used my Copics to color my coffee cups to match the patterned paper. ...
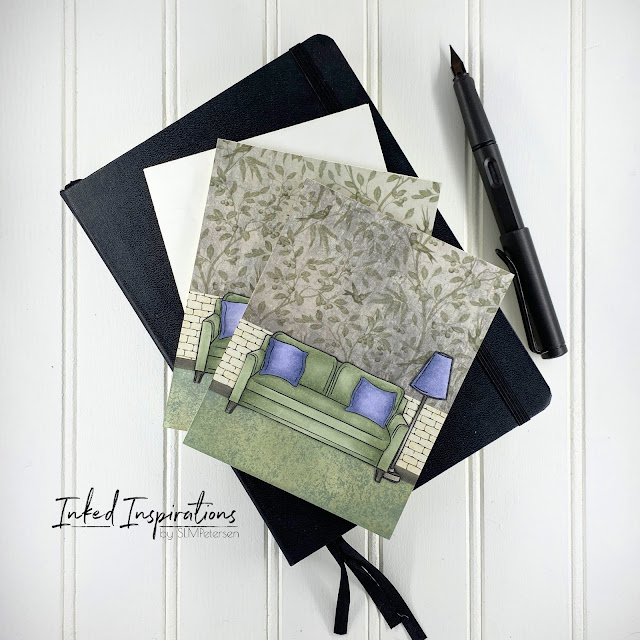
Using Patterned Paper to Build a Scene - Altenew Comfy Couch

Image
I warned you that there'd be more cute furniture cards. Today, I wanted to share some ideas for using patterned paper to build fun scene cards.  This super couch from Altenew required a fun scene, so I built two options.   For the green couch, I pulled some vintage-looking patterned paper with small print from my stash for the wallpaper and had a 6x6 sheet of small bricks that I cut into enough strips to get four cards.  I used Copics to color my couch in a shade of green to match the carpet, with some blue-violet accent pillows and lamp.  Once colored I fussy cut the couch and lamp for the scene.   Time to build the scene.  I ink-blended Distress Oxide in Ice Spruce across the bottom of a white panel.  I used a texture stamp with Stormy Sky and Pumice Stone Distress Ink to create a carpet effect.  I cut the patterned paper I chose for the wallpaper in half for two cards and added it to the top of the card.  Then I added the strip...

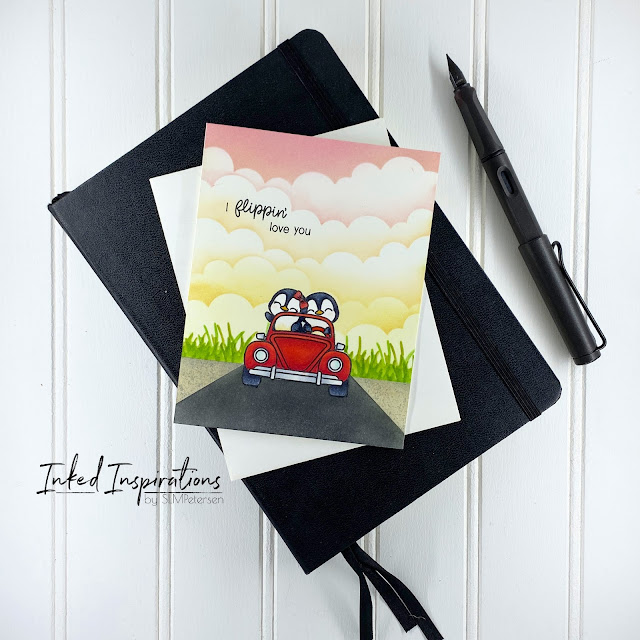
I Flippin' Love You - Sunny Studio Passionate Penguins

Image
I flippin' love this penguin set from Sunny Studio.  I mean seriously?  How could you not love these little guys?  Penguins in a little convertible!  This is the stamp that sold me on needing this set.  Yes.  I said need, and a stamp this cute needed a scene to go with it. I have to say several years ago when I started watching Kelly Taylor build her scene cards I was mesmerized, but I never saw myself building them.  Now, here I am making them! I started this card by stamping and masking my little love penguins in their convertible.  After I masked my car, I used some post-it tape to mask off the bottom of my card so I could build the sunset and add the grass.   The sunset sky was ink blended using Taylored Expressions cloud stencil with Distress Inks in Kitsch Flamingo, Tattered Rose, Saltwater Taffy, Dried Marigold, and Scattered Straw.  With my sky done I added grass using Taylored Expressions grass stencil with Mowed Lawn and P...

Limiting You Color Palette for Copic Coloring

Image
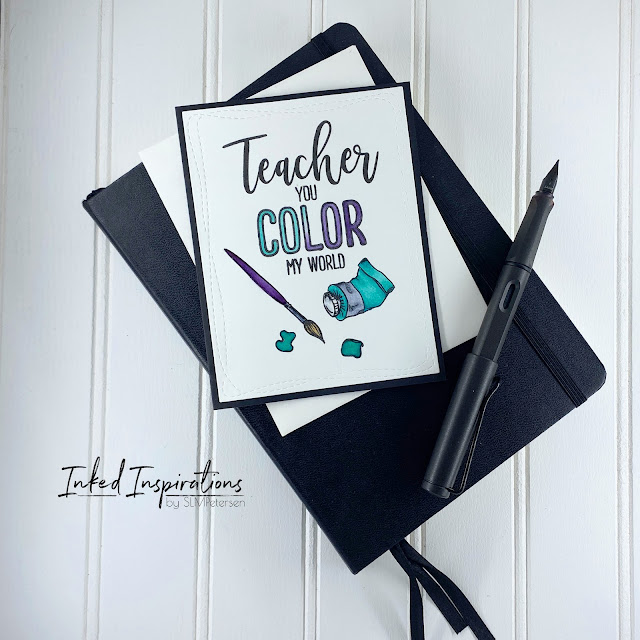
Today I have two more teacher cards for you.  I used Teacher from Waffle Flower and Color My World from WPlus9 to build these.  I kept the design simple with some Copic coloring, using a limited palette.  Limiting your color palette can be a great way to challenge your creative skills. Each card was stamped, colored, and then cut with the Simon Says Stamp Wonky Rectangles dies.  In order to get the "teacher" to line up the way I wanted I stamped the "you color my world" portion first, then removed that stamp from my platform.  Then I lined the "teacher" sentiment up and stamped it.  After I had my sentiment in place I added to brush, paint tube, and puddles of paint to the panel.  With my layout complete, I opted to Copic color these images, with my limited color palette selection and I gotta say the results are so fun!  I love these colors together.  To complete the simplicity of these cards I adhered them to a black card base.  

Cute Teacher Card Ideas

Image
When I'm in the making groove I make dozens of cards a week.  Yes, I said dozens.  Since I only write five posts a week I have photos of dozens of cards that have yet to make it to the blog.  Today's cards are from the teacher cards I made a few weeks ago. The layout for both cards is the same, with the exception of the card above having a few green heart embellishments.  These cards pull together several brands.  I used the Teacher from Waffle Flower, Kindness Matters from Neat and Tangled and one of the past Stamptember sets from Simon Says Stamps. To add variation I colored the puppies in different colors, but the green combo is the same on both cards.  I had only intended for the difference to be the color of the puppy and the color of the card bases, that this until I dropped a green marker on one panel.  How better to hide a mark than with a green heart, but one heart looked very out of balance.  I gravitate toward odd numbers when using emb...

Mixing Brands - Teacher Mouse

Image
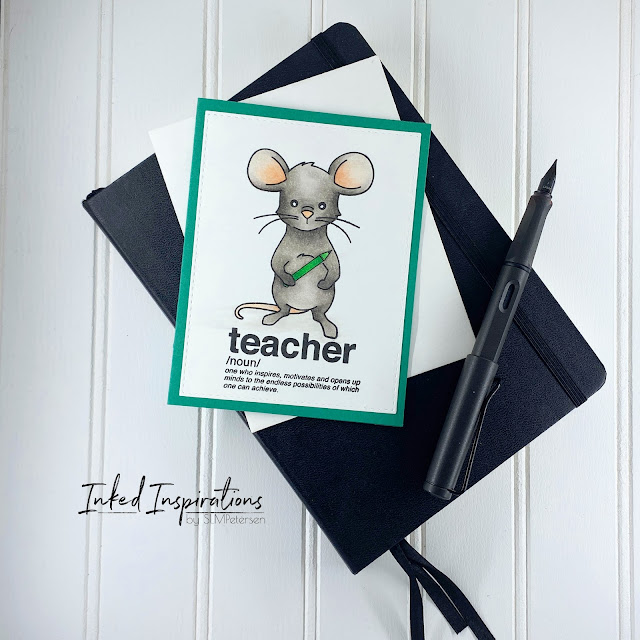
I love a good clean and simple Copic-colored card. No scene, no special techniques, just some awesome markers, and a clean stamped image.  For this card, I pulled Mae Mouse from Honey Bee Stamps out of my stash, along with the Defined Words from Mama Elephant.  The cute little pencil is from the Waffle Flower Teacher set.  Mae comes with a number of cute accessories, but no pencil so I had to do a bit of searching to find the right one to pair with her. Mae Mouse is stamped in my favorite Copic safe ink from Gina K.  I love Gina K's Amalgam ink.  I've tried a few others, but hers seems to be the blackest black in my opinion.  I also use this ink for watercoloring and colored pencils.  In order to put the pencil in Mae's hand, I had to do a bit of masking.  I created a partial mask that would cover just the area I needed.  When I create a partial mask for a small area like this I usually opt for a post-it note.  I make sure to stamp on t...

Inspired by Kelly Taylor - Coffee Cards

Image
I've been watching Kelly's video for somewhere around six years. Kelly is the reason I ended up in the Copic marker cult.  Yes, I said cult, all in jest of course.  I've watched her color amazing scene card after scene card.  Eventually, I drank the cool-aid and bought the markers, but I digress.  We're here to talk about the cards and the inspiration. Last week Kelly shared the video 3 Cards with 1 Stamp Set and I was inspired to play with my various coffee stamp sets.  I also pulled Copic markers in some similar fall shades.  While I used multiple stamp sets, if you check out Kelly's video you'll see the inspiration shine through.   For the first card, I opted for a horizontal layout.  I started with kraft cardstock and the Tim Holtz Quilted 3D embossing folder.  Once embossed, I lightly ink blended Vintage Photo Distress Ink over the entire panel, then took the Ground Espresso pad and swiped it over the top.  If you use a ligh...

Happy Thanksgiving - Blending Copic Colors

Image
Once I got on board the Copic marker train I fell in love. I would say Copic coloring is my second go-to technique for making cards.  My first love will always be ink blending, but we're here today to talk about Copic coloring.   I learned to use my Copic markers watching dozens of YouTube videos, specifically Kelly Taylor videos .  Kelly is a colorist and card maker, with a skill for crafting scene cards.  Watching her videos taught me how to blend a rainbow of colors to create something other than a traditional color blend of light, medium, and dark in a color family.  For today's card, I'm using the tips I've gleaned over the years of watching Kelly's videos . I started this card by stamping the birch leaf from the Tim Holtz Autumn Blueprintsketch stamp set in Gina K Amalgam ink.  I added the sentiment from Colorado Craft Company's Thankful set.   In the Fall, birch trees turn from a yellow-green to a golden yellow.  With that in min...

Colorado Craft Company Perfume Bouquet - Get Well

Image
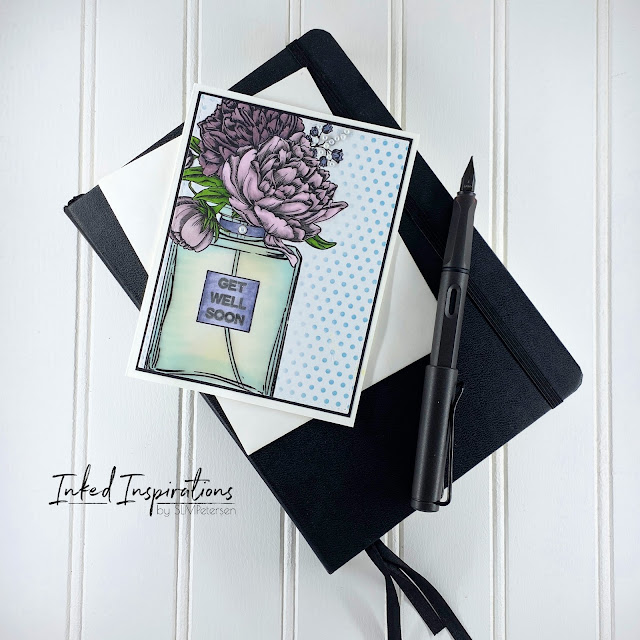
I recently purchased a few of the Big & Bold stamp sets from Colorado Craft Company.  The images in these stamp sets are much larger than the standard A2 size card, but that didn't stop me from using this large perfume bottle.   I stamped the large image on the left side of the card with parts of the image hanging off of the white panel using Gina K Amalgam ink.  Gina K's Amalgam ink is Copic safe, meaning that once dry alcohol markers won't smear the stamped image.   The flowers were colored with RV10, RV000, V95, and V91.  I used YG67 and YG17 on the leaves.  I created a bit of a shadow on the perfume bottle with B000, to give an effect of glass.  The labels on the bottle were colored in BV31and BV23. To the right side of the panel, I added some ink blending with the mini dots stencil from Echo Park with a bit of Tumbled Glass Distress Ink.  After the ink blending, I cut the panel with the Simon Says Stamp stitched rectangles. To c...

My Copic Tools - Color Combo Swatch Sheets

Image
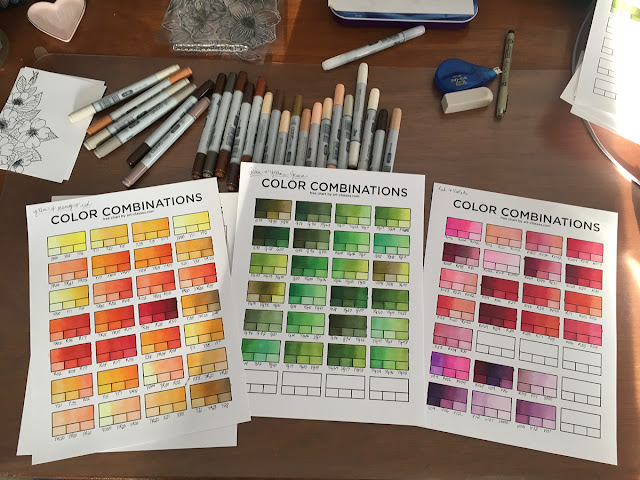
Over the past few weeks, I've talked about what I wish I'd known , my swatch book , and how I use the hex chart .  Today, we're going to talk about the Color Combo Swatch Sheets I use and their benefits.  These sheets are also from Sandy Allnock.  I added them to my cart when I purchased my hex chart, thinking I'd use them eventually. Then came The Peony Project a few years ago.  I needed to swatch some colors for a potential client.  I put the pdf on a thumb drive and had it printed on the cardstock I use for my Copic coloring.  Once I had my sheets I sat down and began swatching.  I swatched the entire project on one sheet, as you can see below.  The tiny "X" represents the color combos I used for the card order. There are five versions of the color combinations sheet in the download and I use sheet five.  These sheets are perfect for two or three marker blends.  If you're like Kelly Tay...

Inspired by - Yana Smakula

Image
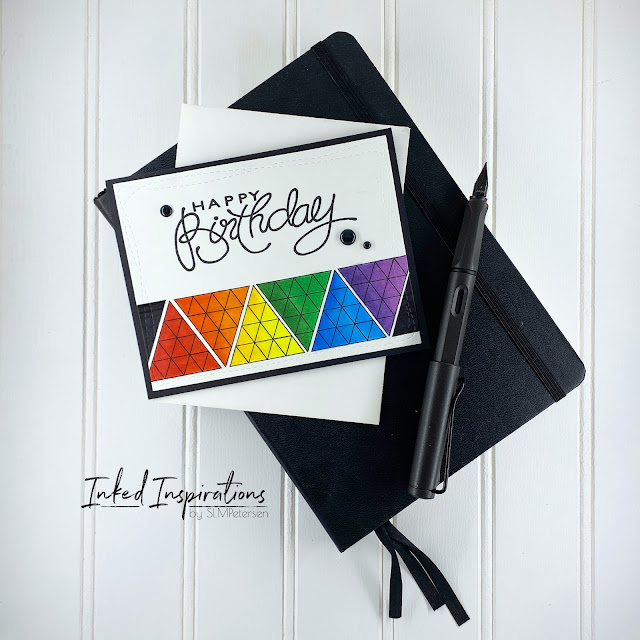
I'm often inspired by other makers and their ideas. Yana Smakula has a unique style and I can pick a Yana card out of any lineup, she is great at using smaller images to make an impact on cards.  When I watched one of her older videos,  5 Ways to Stamp Backgrounds (not using background stamps) , I was inspired to use some of my smaller stamps.  While I didn't create a background on this card, I created a focal image using just one small stamp. The magic here is not only in using a small stamp on repeat, it's also a stamp from an older Hero Arts Christmas stamp set.  I rotated the triangle each time I stamped to create a geometric focal point, using Gina K Amalgam ink.  Then came the rainbow of Copics to color the images and make them pop. The large birthday sentiment from Creative Expressions balances the card panel.  I used the Wonky Rectangles from Simon Says Stamp to add the faux stitching.  The panel was mounted on a black card base and I added b...

Creating Custom Cards - The Peony Project

Image
The idea of creating custom cards can seem truly overwhelming. In all actuality, customizing cards is a fantastic way to stretch your creativity.  You have the opportunity to build a card unique to the recipient. So, whether you create individual cards or mass-produce multiples, don't let customized cards intimidate you.  They are a challenge worth stepping up to. The project I'm sharing today was created as a custom order of multiples for a fellow small business in our small town.  I lovingly call this The Peony Project.  This was an extensive undertaking when it comes to projects because of all the hand coloring, but the challenge was so good for my creativity. I started this project with color swatching, stamping various peony images, and creating a set of samples if you will.  Then a meeting with the client to show her the samples and make decisions for the designs to be used.  I created a set of gift subscription cards and a set of thank you cards as p...

My Copic Tools - The Hex Chart

Image
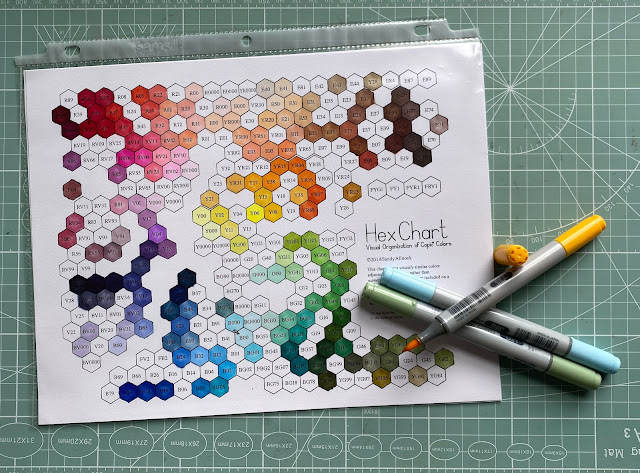
We've talked about what I wish I'd known and we've talked about my swatch book . Today we're going to discuss Sandy Allnock's Hex chart .  I was a later adopter of the hex chart and today I'm going to talk about how I use mine. Above is my hex chart for my Caio markers.  If you're really observant you may have spotted my two small errors.  I wasn't willing to color my chart all over again, so I drew a couple small arrows to show notate the colors I transposed.  Ok, housekeeping out of the way, on with the discussion.   I use my hex chart as more of a color wheel than I do for color selection.  I often start with colors in mind and select colors from my swatch book, but when I want to blend something a bit more unusual or if I use a marker that I don't have a "blending buddy" for I turn to the hex chart.  For example one of my favorite blends is B99 with BG09.  These are both deep dark shades and they create a stunning dark blend.  I a...

My Copic Tools - Swatch Book

Image
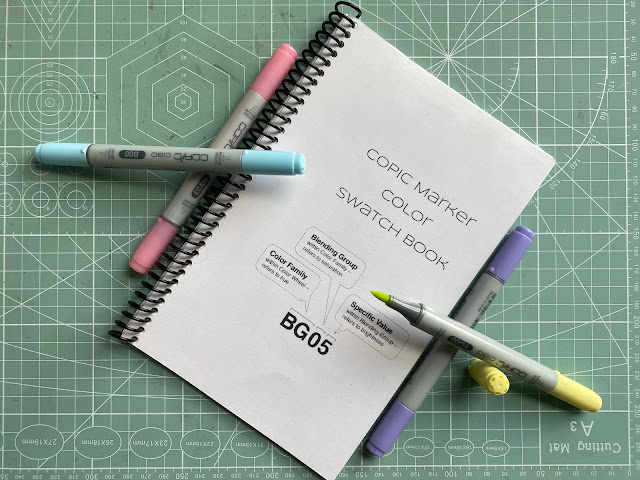
I recently talked about What I wish I'd known about Copics , today I'm going to start a series on the tools I use when working with my Copics.  Make no mistake, I love my Copics, but there was a bit of a learning curve and tools have helped me learn to work with my markers and improved my blending skills. My swatch book came before Sandy Allnock's Hex chart .  I created my own swatch book, inspired by a few ideas I'd seen.  I wanted my swatch book to be grouped by color family in a certain way.  When I designed my book I included a check box for tracking refills and a "C" for the colors available in the Caio style.  I have the Caio collection of colors, all 180 of them, so why did I care about including other colors?  Because I share nearly all my craftiness with my bestie over at By Grace Everett , and she's invested in the Sketch style.  I included all the colors, except the fluorescent colors.   Once I was happy with my simple design, I t...

What I Wish I'd Known About Copic Markers

Image
I was late to the Copic marker party. I'll be honest, I wasn't on board with these "magic markers" mostly because of the cost. Then my bestie said she was gonna get a few colors and try them. Remember I told you we feed off each other? Yep, yet another example of that. So in I went. If you're new to Copic markers, there are essentially three styles or sizes if you will.  Classic (214 colors), Caio (180 colors) and Sketch (358 colors) are the most common with the most colors being available in Sketch.  I opted for the Caio, again still making my decisions based on price, as the Caio is the smallest of the Copic family in both color selection and marker size. After watching several videos, and talking about it for weeks to Hubby, I bought a handful of colors.  I think I was looking for the magic colors to start with.  I'm gonna let you in on a secret, there is no magic color set out there.  Anyone who colors with Copics has their go-to colors, but it's reall...