
Shop Your Stash - Ink Blending Clouds
I'll start by saying sometimes I forget what I have in my stash. Several weeks ago I got a little carried away ink blending clouds and discovered that I have two sets of cloud stencils. The possibilities are totally endless, whether you have one cloud stencil or several. Things kind of started to snowball as I began the "what if I..." game. I started adding rainbows and birds and more clouds. Oh my!
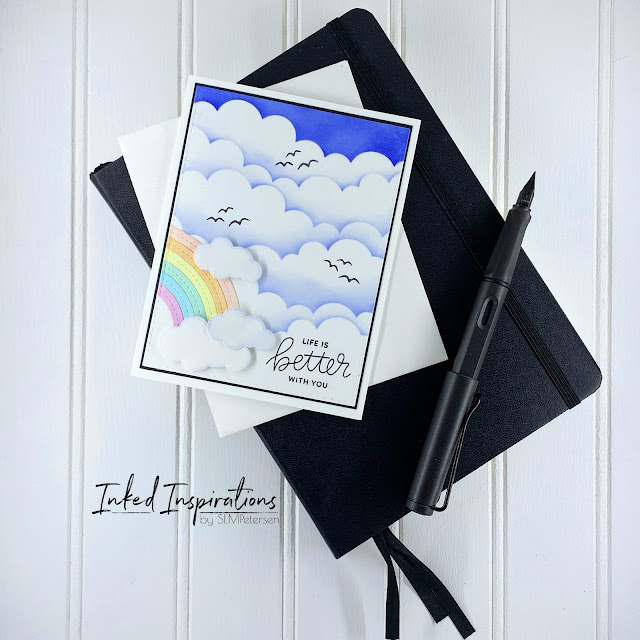

This beauty started with layers of ink-blended clouds. I learned a few things playing with this technique:
- It's easier to keep white space in the clouds if you blend from the top down with the top being the "sky".
- Vary the way you position your stencil, this will create a more organic look.
- Using a blender brush will result in a softer more cloud-like feel.
After blending my clouds using Prize Ribbon Distress ink I started thinking about the tiny birds I'd seen Yanna use when she made these cards. I knew I didn't have the set she'd pulled them from. It was time to scour my stash for tiny birds. Bingo! Newton's Nook to the rescue.
Hmmm...what about a rainbow? Adding a rainbow was an easier find than the birds. I pulled the MFT Stitched Rainbow from my stash and cut it from white and used Copic markers to color each section. No fancy blending, just a single color on each stripe. I also opted for pastel tones, rather than vivid ones so as not to compete with the bold blue of the sky.
Next, I needed something to ground my rainbow and complete the scene. Back into the stash. I happened to have the My Heart Soars dies from Simon Says Stamp. I pulled the cloud dies, cut them from white, and did a very light ink blend on the edges. When I ink blended the cloud edges I used whatever ink remains on the brush from blending the large panel.
Time to put all my layers together and add the sentiment. I stamped the birds and sentiment in VersaFine black ink. Using liquid glue I added my rainbow, letting it hang off the panel halfway, then I die cut the panel with my stitched rectangle dies. Next, the cloud panel was adhered to a black card base. To complete the card I added my die-cut clouds using a bit of foam tape for dimension.
Comments
Post a Comment