Posts

Showing posts with the label Coloring

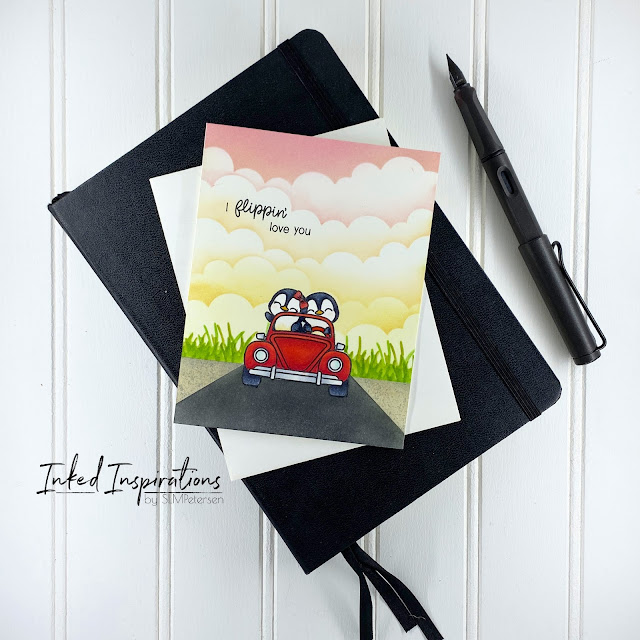
I Flippin' Love You - Sunny Studio Passionate Penguins
Image
I flippin' love this penguin set from Sunny Studio.  I mean seriously?  How could you not love these little guys?  Penguins in a little convertible!  This is the stamp that sold me on needing this set.  Yes.  I said need, and a stamp this cute needed a scene to go with it. I have to say several years ago when I started watching Kelly Taylor build her scene cards I was mesmerized, but I never saw myself building them.  Now, here I am making them! I started this card by stamping and masking my little love penguins in their convertible.  After I masked my car, I used some post-it tape to mask off the bottom of my card so I could build the sunset and add the grass.   The sunset sky was ink blended using Taylored Expressions cloud stencil with Distress Inks in Kitsch Flamingo, Tattered Rose, Saltwater Taffy, Dried Marigold, and Scattered Straw.  With my sky done I added grass using Taylored Expressions grass stencil with Mowed Lawn and P...
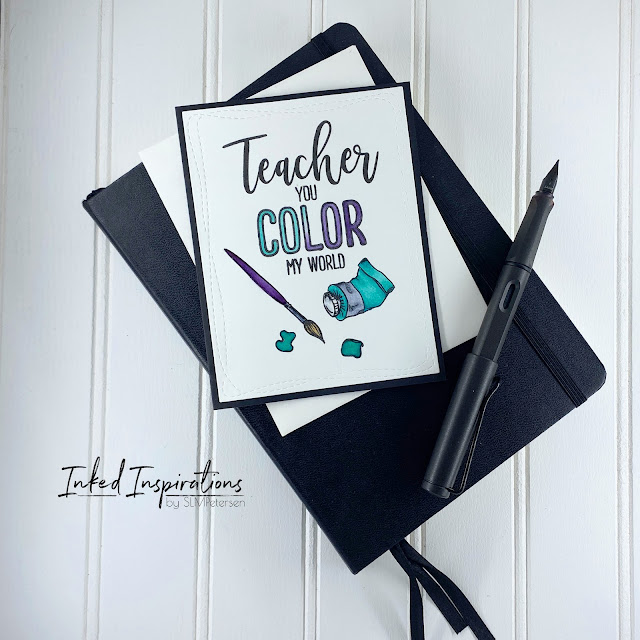
Limiting You Color Palette for Copic Coloring

Image
Today I have two more teacher cards for you.  I used Teacher from Waffle Flower and Color My World from WPlus9 to build these.  I kept the design simple with some Copic coloring, using a limited palette.  Limiting your color palette can be a great way to challenge your creative skills. Each card was stamped, colored, and then cut with the Simon Says Stamp Wonky Rectangles dies.  In order to get the "teacher" to line up the way I wanted I stamped the "you color my world" portion first, then removed that stamp from my platform.  Then I lined the "teacher" sentiment up and stamped it.  After I had my sentiment in place I added to brush, paint tube, and puddles of paint to the panel.  With my layout complete, I opted to Copic color these images, with my limited color palette selection and I gotta say the results are so fun!  I love these colors together.  To complete the simplicity of these cards I adhered them to a black card base.  

Cute Teacher Card Ideas

Image
When I'm in the making groove I make dozens of cards a week.  Yes, I said dozens.  Since I only write five posts a week I have photos of dozens of cards that have yet to make it to the blog.  Today's cards are from the teacher cards I made a few weeks ago. The layout for both cards is the same, with the exception of the card above having a few green heart embellishments.  These cards pull together several brands.  I used the Teacher from Waffle Flower, Kindness Matters from Neat and Tangled and one of the past Stamptember sets from Simon Says Stamps. To add variation I colored the puppies in different colors, but the green combo is the same on both cards.  I had only intended for the difference to be the color of the puppy and the color of the card bases, that this until I dropped a green marker on one panel.  How better to hide a mark than with a green heart, but one heart looked very out of balance.  I gravitate toward odd numbers when using emb...

Mixing Brands - Teacher Mouse

Image
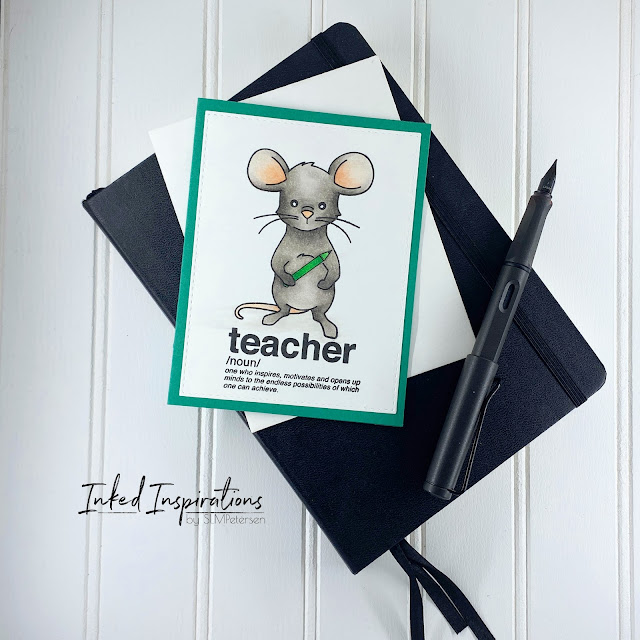
I love a good clean and simple Copic-colored card. No scene, no special techniques, just some awesome markers, and a clean stamped image.  For this card, I pulled Mae Mouse from Honey Bee Stamps out of my stash, along with the Defined Words from Mama Elephant.  The cute little pencil is from the Waffle Flower Teacher set.  Mae comes with a number of cute accessories, but no pencil so I had to do a bit of searching to find the right one to pair with her. Mae Mouse is stamped in my favorite Copic safe ink from Gina K.  I love Gina K's Amalgam ink.  I've tried a few others, but hers seems to be the blackest black in my opinion.  I also use this ink for watercoloring and colored pencils.  In order to put the pencil in Mae's hand, I had to do a bit of masking.  I created a partial mask that would cover just the area I needed.  When I create a partial mask for a small area like this I usually opt for a post-it note.  I make sure to stamp on t...

Inspired by Kelly Taylor - Coffee Cards

Image
I've been watching Kelly's video for somewhere around six years. Kelly is the reason I ended up in the Copic marker cult.  Yes, I said cult, all in jest of course.  I've watched her color amazing scene card after scene card.  Eventually, I drank the cool-aid and bought the markers, but I digress.  We're here to talk about the cards and the inspiration. Last week Kelly shared the video 3 Cards with 1 Stamp Set and I was inspired to play with my various coffee stamp sets.  I also pulled Copic markers in some similar fall shades.  While I used multiple stamp sets, if you check out Kelly's video you'll see the inspiration shine through.   For the first card, I opted for a horizontal layout.  I started with kraft cardstock and the Tim Holtz Quilted 3D embossing folder.  Once embossed, I lightly ink blended Vintage Photo Distress Ink over the entire panel, then took the Ground Espresso pad and swiped it over the top.  If you use a ligh...

Happy Thanksgiving - Blending Copic Colors

Image
Once I got on board the Copic marker train I fell in love. I would say Copic coloring is my second go-to technique for making cards.  My first love will always be ink blending, but we're here today to talk about Copic coloring.   I learned to use my Copic markers watching dozens of YouTube videos, specifically Kelly Taylor videos .  Kelly is a colorist and card maker, with a skill for crafting scene cards.  Watching her videos taught me how to blend a rainbow of colors to create something other than a traditional color blend of light, medium, and dark in a color family.  For today's card, I'm using the tips I've gleaned over the years of watching Kelly's videos . I started this card by stamping the birch leaf from the Tim Holtz Autumn Blueprintsketch stamp set in Gina K Amalgam ink.  I added the sentiment from Colorado Craft Company's Thankful set.   In the Fall, birch trees turn from a yellow-green to a golden yellow.  With that in min...

Creating Custom Cards - The Peony Project

Image
The idea of creating custom cards can seem truly overwhelming. In all actuality, customizing cards is a fantastic way to stretch your creativity.  You have the opportunity to build a card unique to the recipient. So, whether you create individual cards or mass-produce multiples, don't let customized cards intimidate you.  They are a challenge worth stepping up to. The project I'm sharing today was created as a custom order of multiples for a fellow small business in our small town.  I lovingly call this The Peony Project.  This was an extensive undertaking when it comes to projects because of all the hand coloring, but the challenge was so good for my creativity. I started this project with color swatching, stamping various peony images, and creating a set of samples if you will.  Then a meeting with the client to show her the samples and make decisions for the designs to be used.  I created a set of gift subscription cards and a set of thank you cards as p...

3 Versions with Copic Warm Greys - Updated

Image
Copic markers have become my go-to medium for coloring cards. I love how easy it is to create definition by color layering and blending. Copics are kind of magic. I use a lot of warm greys to color critters. Today I'm sharing three ideas for coloring critters using the Copic warm grey markers. These cute little bears are from the Gerda Steiner Panda set, and I love the fact that they're designed in a way that they can be colored to create other bears. Light Grey Bear (top left) is colored with W0 W1 W3 with W3 W5 and W7 for the eyes and footpads. Shades of orange were used to color the pile of hearts and C2 and C0 were used to shade the envelope. I cut the completed panel with the largest Wonky Rectangles die and mount the completed panel on an orange card base. Medium Grey Bear (top right) is colored with W1 W3 W5 with W0 and W1 for the eyes and footpads. Shades of teal and green were used to color the pile of hearts and C2 and C0 were used to shade the envelope....

Color Swatching

Image
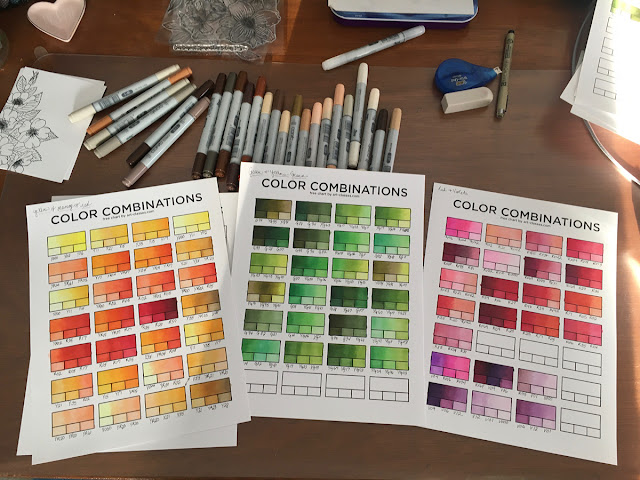
Color swatching is fairly new to me. I've only recently found the value in color swatching markers, paints, pencils, inks, etc. Up until a couple of years ago I never really saw value in this practice. So what changed? Honestly, joining the Copic marker cult. Yes, I said cult, because well these markers do kind of have a cult following.   Copic markers are alcohol markers, the medium I turn to most often when creating my hand-colored cards. These markers are designed to blend and create depth when coloring. They're transparent and layering the colors creates a lot of definition. About a year ago I actually started keeping track of color combinations for blending. Color swatching is about more than just a patch of color on a substrate. While trying colors on the substrate you'll be using is very helpful, I find more value in swatching when it comes to mixing or blending colors. This gives me a chance to try the combination to see if I get magic or mud out of it. ...

Trying Something New - Preorder Options

Image
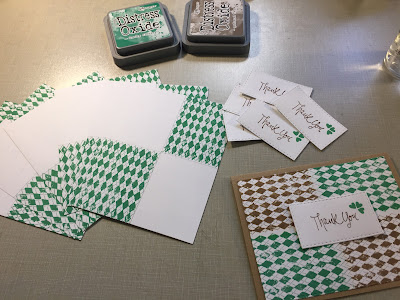
For the last four years, I've created custom thank you cards for a couple of 4-Hers. The first year, I was eager to make them, but really had no farm or animal-themed supplies. I created some very basic cute cards with a few background stamps and I used a heart to create a clover. They turned out really cute, but I knew I'd need to add some farm animals to my stamp collection for the next year. In year two, I had cute animals to stamp and hand-color. There was a small challenge of needing a turkey, which ended with me coloring a chicken stamp to try and pass it off as a turkey. I think it worked pretty well. I also created cute pig and sheep cards. The animals were hand-colored with Copic markers and I created layers with die cuts on some fun plaid paper. I was upping my game. In the third year, I snagged a few more stamp sets and received two orders. I had three orders in the third year. I did the same hand coloring with Copic markers this go-round, but I fussy cut the animals...

Fixing Mistakes

Image
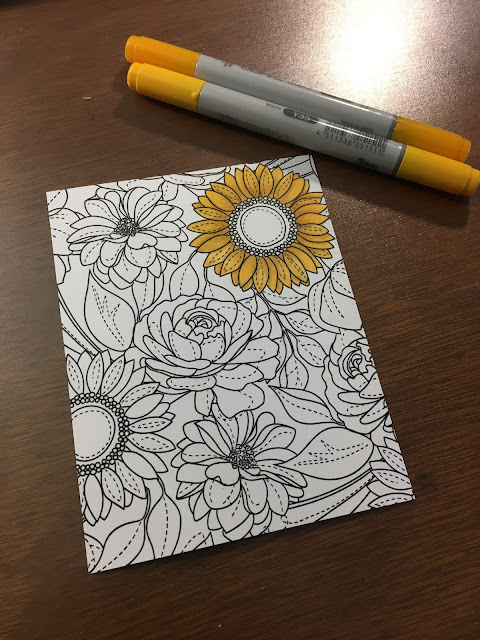
The reality of my creative work is that I'm human and I make mistakes, sometimes big ones. Take for example a custom card I created a week ago. For a 70th Birthday. Big birthdays deserve amazing cards. Step one was to set about coloring an amazing background of beautiful florals with Copic markers. These kinds of projects take a considerable amount of time and I enjoy every minute of creating them. Coloring is a wonderful way to get lost and forget about a busy day.  It's very therapeutic for me as a maker. Once my beautifully colored background was complete I decided to cut the numbers from the panel. Here's where this big oops happens. I haven't a clue what possed me to cut 75 from the panel, but I did. What's more, the card was a custom creation for a friend who needed it the next morning. There was no time to recolor a second panel and recut it. So, how to fix this GIANT booboo? Well, you carefully pull apart the layers. Next, you tape the "5...

MFT Big Wave Coloring Book Background Stamp - Thanks

Image
Hello Lovely.  I'm back with the MFT Big Wave Coloring Background stamp.  I'm loving all my background stamps for coloring lately.  This time I did my coloring by using Distress Inks for watercoloring. I started this card by stamping the MFT Wavy Coloring Book Background on to white cardstock using Simon Says Intense Black ink.  I smooshed Dried Marigold, Pumice Stone, and Tumbled Glass Distress Inks on to my craft mat and spritzed them with a little bit of water to create the watercolors I used on this project.  After the watercoloring dried I went in with a couple of my Sakura Pigma pens to color in a few areas to create a bit of black pop.  I cut the colored panel with my favorite Stitched Rectangles dies from Simon Says Stamp. I completed the card by matting the colored panel with gray cardstock and adhering it to a seafoam card base.  I added the black Thanks die cut using the Paper Smooches Thanks Word die for the finishing touc...

SSS Wednesday Challenge - Make Your Own Background

Image
Hello Lovely.  Today I created a card channeling my inner Yana Smakula .  Simon Says Stamp's Wednesday's Challenge was Make Your Own Background this week.  Rather than using one of my background stamps I opted to pull out some small stamps and went to work building a background.  I chose the Simon Says Birthday Celebration stamp set to create this cute elephant background.  I started by stamping one elephant and one balloon to get proper placement for each one.  Of course, you all know I used my favorite black ink - VersaFine Black Onyx.  I took the little stars from the set and filled in around the elephants to complete the panel.  Onto the coloring. I colored all of the elephants using my Arteza Real Brush Pens.  The party hats were all colored with the Kaiser Colour Metalic Gel Pens. I used a pink Prisma Color pencil to add a bit of pink to each cheek and inside of each elephants ear.  I wasn't happy with the yellow I ...